Posts by Hobby Steve

10 Magnet Fishing Tips – Increase Your Finds Today

10 Of The Best Magnet fishing tips

If you implement these 10 simple magnet fishing tips today you are sure to increase your finds!

So you’ve read our beginners guide to magnet fishing,  you’ve treat yourself to one of the best magnets for magnet fishing, and finally you have places to go magnet fishing but you’re still left wondering what you are doing wrong or how you can find more! Don’t worry we’ve got you covered.

All of the following magnet fishing tips are simple to follow and will help you with your magnet fishing journey.

  1. Don’t expect to find all the time

    When you first start out the hobby of magnet fishing you’re going to be excited, excited at the possibility of finding treasure or something of great value. In reality this is very very rare. Don’t get your hopes up before you go out as this can lead to impatience and giving up to early.

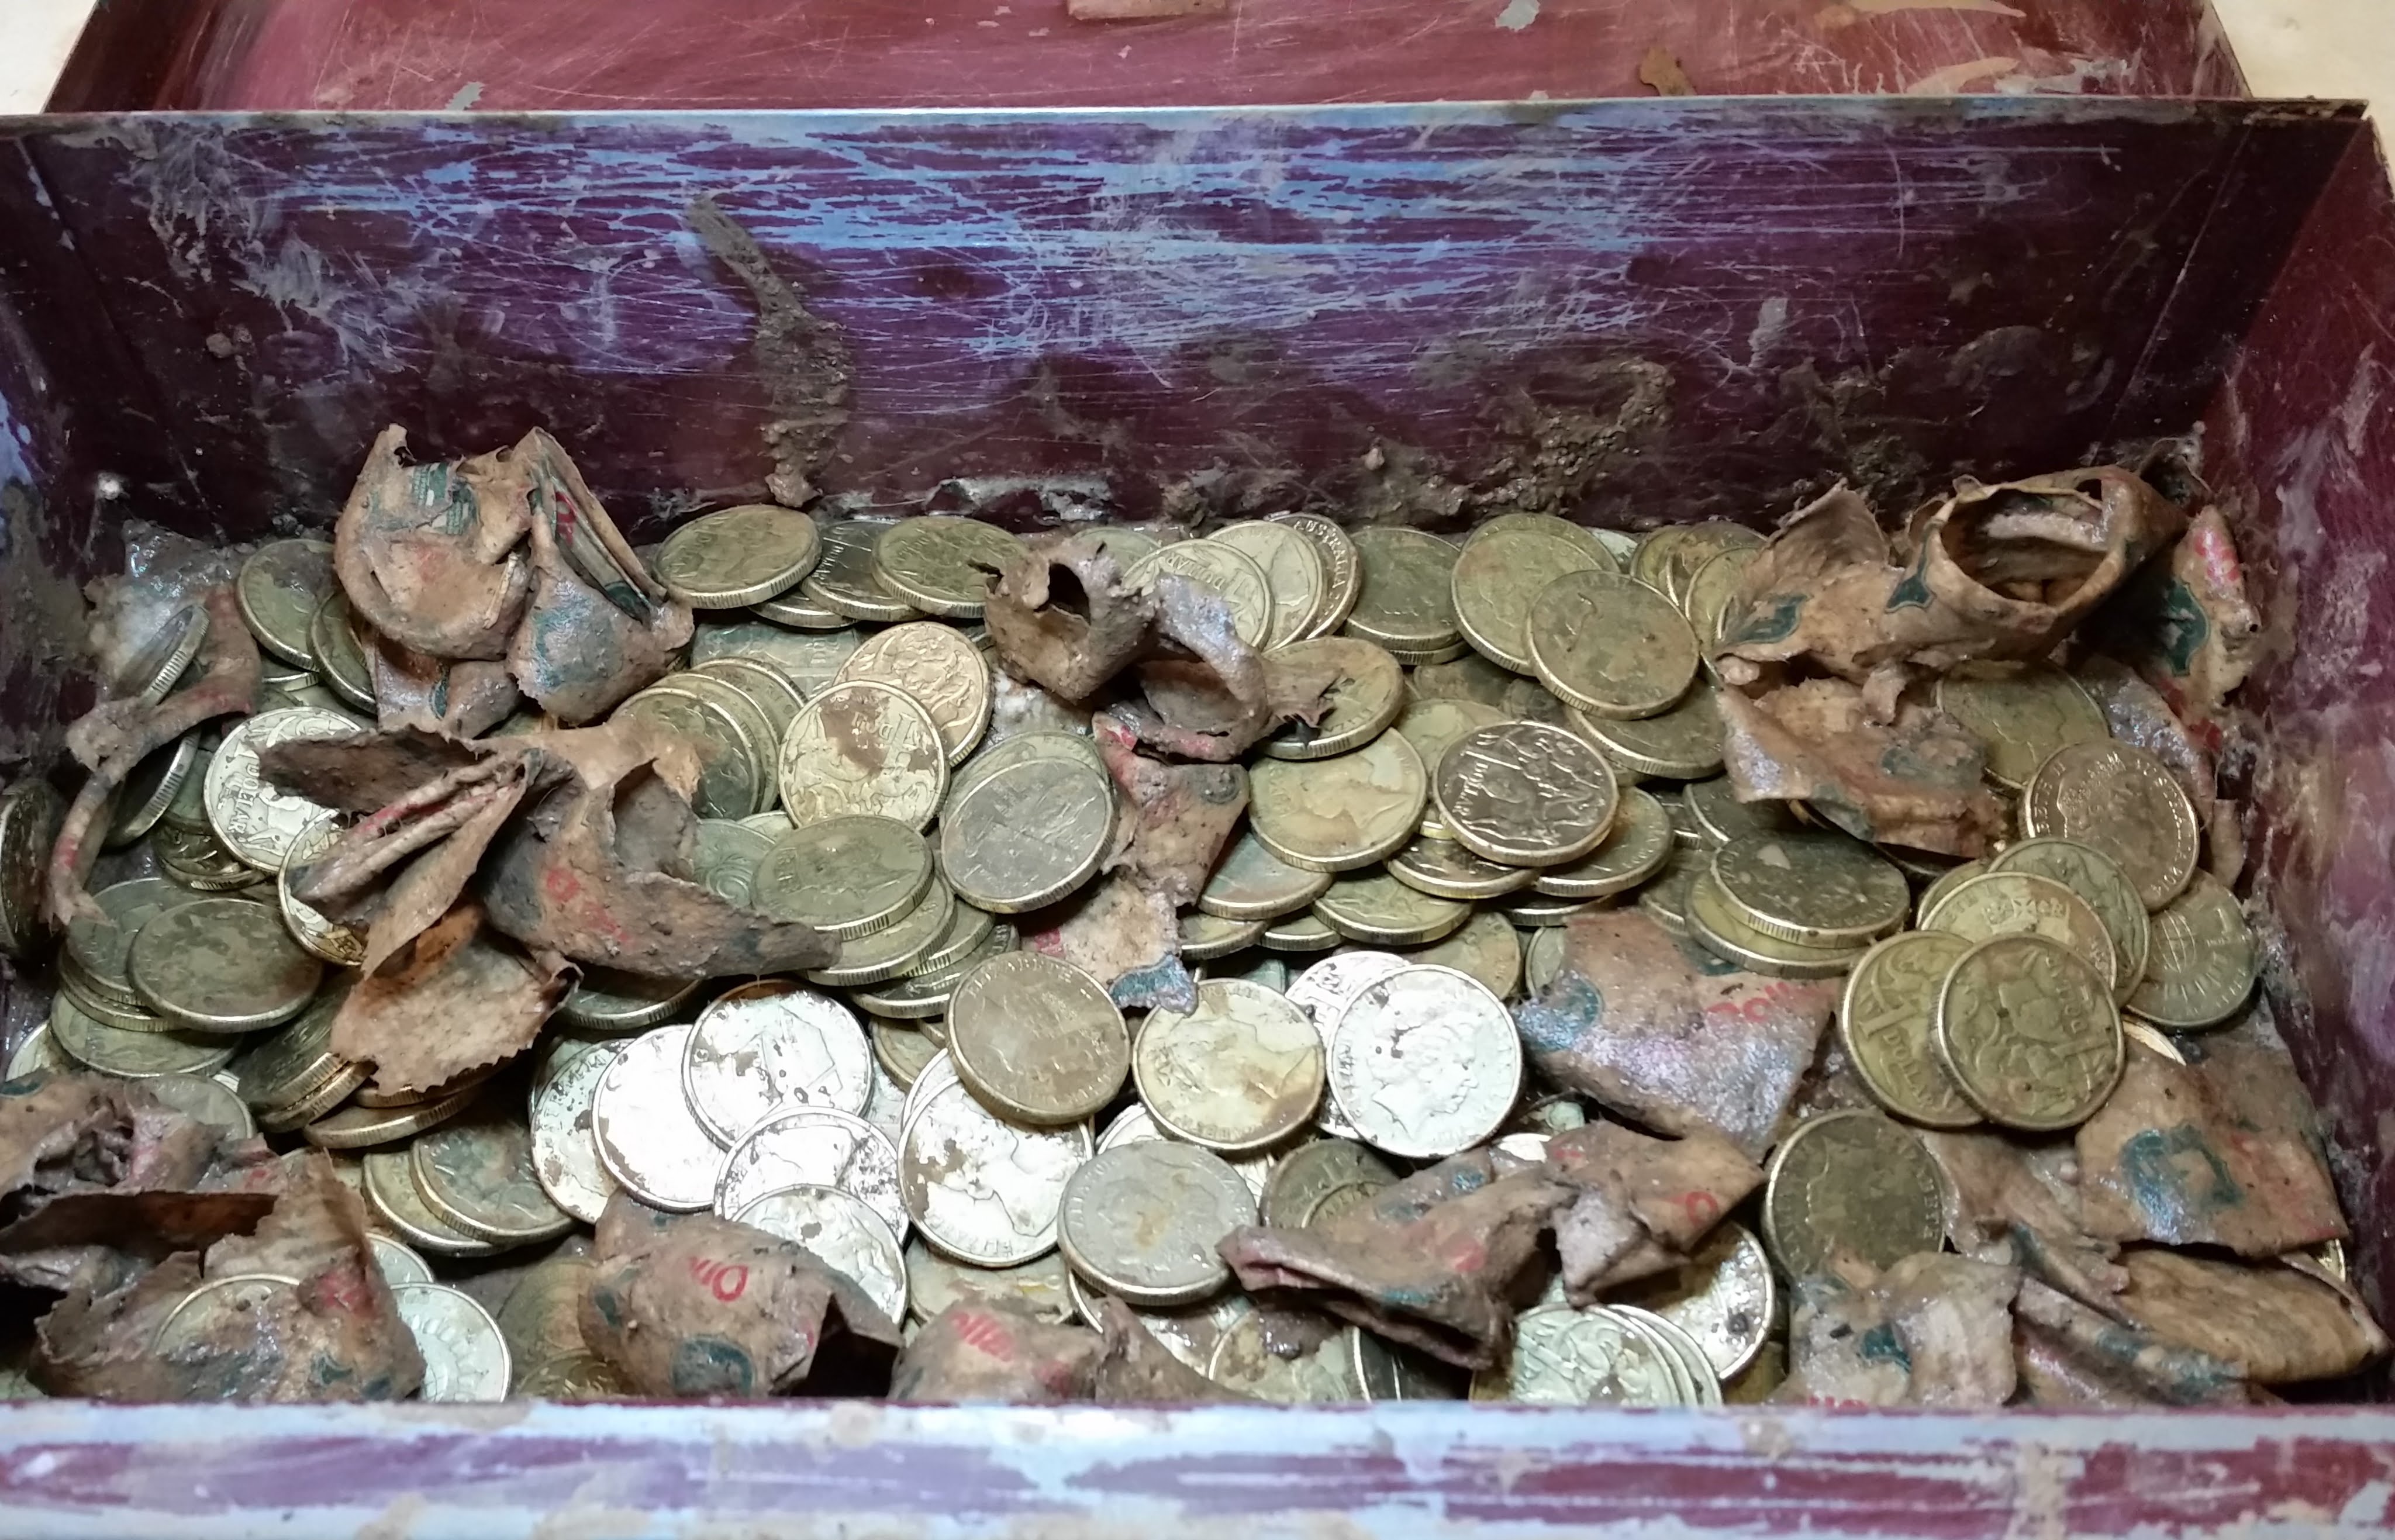
    A usual days haul in the life of a magnet fisherman consists of mainly scrap. A few old copper coins, some random parts of a boat and other rubbish. Safes, weapons and treasure are few and far between. However, stick at it and take the rough with the smooth. Eventually you will find something of interest or importance.

  2. Try not to drag the magnet

    To help you avoid issues with your magnet, avoid dragging it across the bed of the river or lake if possible.

    You should ensure the rope length is properly adjusted to around 8 inches from the surface, or higher if you are still getting snagged on rocks and weeds.

    A common mistake people make when magnet fishing is believing that the magnet won’t catch on to the loot if its higher up! Trust in your magnet it has enough strength and won’t miss anything. Making this one of the best magnet fishing tips you could follow.

  3. Take more than one magnet

    So a good magnet fishing tip is that as a magnet fishing hobbyist its safe to say that you stand a good chance of losing your magnet. Then what? If you have no way of recovering it, it’s pretty much home time!

    If you have a backup magnet then you don’t need to go home! You can stay out and continue you treasure hunting.

    I personally have one smaller magnet and then one more powerful just in case, this way you’re not latching onto things that are too heavy to pull out, but, if you do find something that sparks your interest and your magnet isn’t strong enough you can swap them over!

  4. Throw and pull method

    Number 4 of our beginners magnet fishing tips list is focusing on the method you use to fish. There are a couple of different popular methods for magnet fishing the main one being drop and pull.

    I personally have way more success with the throw and pull method.

    It’s pretty much exactly what it says throw your magnet as far as you can out into the water and pull it back towards you.

    You can also, depending on where you are and if its safe to do so, throw, walk and pull.

    Sometimes I try and zig zag the magnet through the water to cover more area.

    Throw & Pull Magnet Fishing Tips

  5. Slow down

    Here’s another really important one to add to our magnet fishing tips! Slow down! Don’t rush things. We know you’re excited, but by rushing you’re likely to miss out on lots of items.

    If you’ve not got a double sided magnet then you need to make sure that the bottom of it is facing out, if you pull to fast you won’t give the magnet chance to attach on to the items on the bed.

    Instead of yanking at the rope, pull slowly to allow the magnet to stay face out and to attract anything it comes into contact with. Giving it chance to “stick”

  6. Use Loctite

    If you’ve never heard of this wonderful little substance then you need some! Loctite threadlocker glue could potentially save you hundreds of pounds in lost magnets.

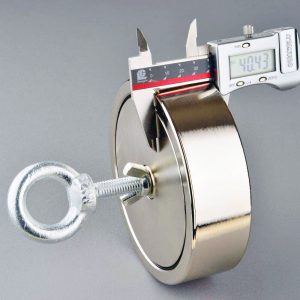
    Thread locker such as Loctite is applied to the eye bolt thread and will stop your magnet from unscrewing over time and getting lost, its really simple to apply and you shouldn’t be without it.

  7. Alternate magnet fishing techniques

    Don’t just repeat the same magnet fishing technique over and over again, vary it up, alternate and try to cover as much area as possible. Drop and pull, throw and pull, throw walk and pull etc you’re sure to find your own favorite techniques too largely depending on where you are magnet fishing.

  8. Use a grappling hook

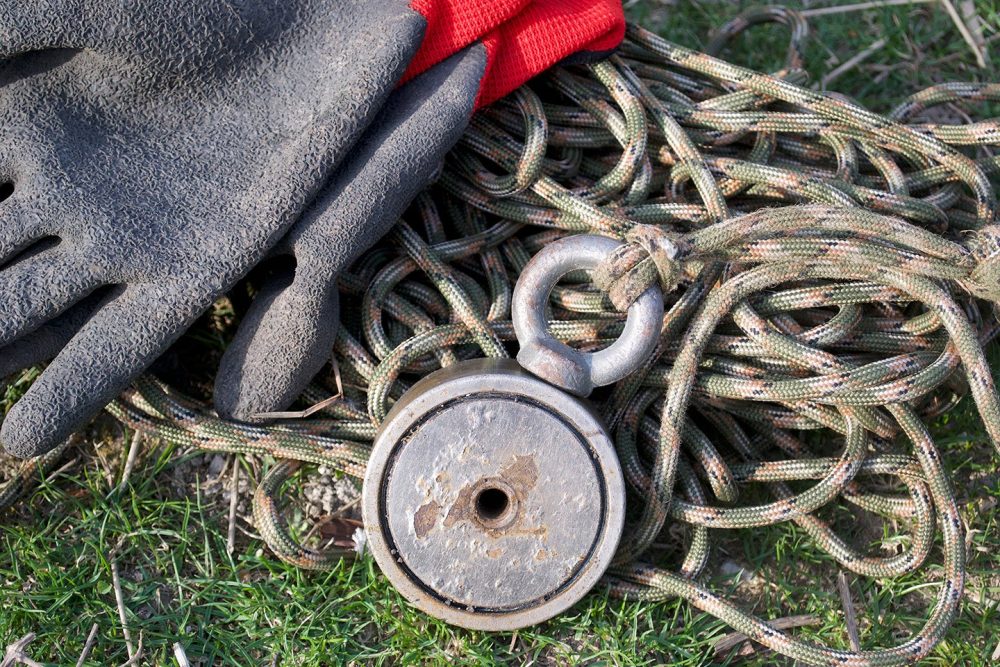
    This magnet fishing tip is one that is often overlooked, grappling hooks will help especially if you’re out to find the bigger items. The grappling hook attached will give you extra grab when recovering items with your magnet.

  9. Ensure you use strong rope

    Choosing the right rope could also potentially save you lots of money in lost magnets, make sure the rope that you choose is strong, strong enough to pull out large heavy items, strong enough to withstand getting snagged and a good old tug.

  10. Research your locations

    In my opinion researching where you are going to go magnet fishing beforehand is probably one of the best magnet fishing tips we could give you.

    It could potentially save you a wasted trip!

    When researching the places to go magnet fishing, you should consider things like if its been a body of water for long periods of time, the location and if its a high traffic area, If you could imagine someone throwing something into the water where you are considering going, you could use old maps to see how long the body of water has been marked on the maps etc You could speak to people from the area also.

    So these are my magnet fishing tips so far, bare in mind I am just a beginner in the hobby really and have only been out a handful of times. If you have any really good tips and are a bit of a pro, we would love to hear from you so we can grow this list of simple tips for magnet fishing.


5 Simple Astral Projection Tips That Really Work

Implement these simple astral projection tips to increase your chances of a successful visit to the plane.

If you have arrived here you’re probably struggling to have success in astral projection. The following astral projection tips can be applied to make the process more simple and increase the likelihood of you visiting the astral plane.

It is recommended that as a beginner you should first do your research and these beginners astral projection tips should only be applied once you have more knowledge.

Take a look at our beginners guide to astral projection before you apply these simple tips. Or check out this fantastic book.

Get comfortable

Before you try Astral projection you should get as comfortable as possible and clear your mind. Using a pillow or blanket is recommended this will help you become comfortable and less distracted. 

Ensure you can breathe comfortably.

Let go of fear

The number one thing that will stop you from being able to successfully astrally project is your fear. Fear WILL hold you back. Your fears are irrational, bare that in mind and you do not have anything to worry about.

One of our main fears when starting out with astral projection is fear of the silver chord breaking. Or possession. 

You can rest assured that the silver chord will not break providing you do not stay too long in the astral plane. It is stronger than you think. 

It is paramount that you remain relaxed, calm and at all times in a positive mindset. Some people like to meditate beforehand and even take up yoga.

Lucid Dreaming and Astral Projection

There’s a big difference between Lucid dreaming and astral projection, it will serve you well to always remember this as a beginner. Dreaming is dreaming and projecting is projecting. Once you successfully visit the astral plane you will quickly realise there is a huge difference between the two. 

Astral projection is far too vivid to be considered a dream.

Binaural Beats and Isochronic Tones

Another good astral projection tip for beginners is to listen to binaural beats and isochronic tones. This will help you reach the state of required relaxation. Again relaxation is paramount.

Binaural beats are tuned in with your brain waves and really do help.

Remember your experiences

Before you leave the plane and your astral body returns to your physical body, try your hardest to remember your experiences.

Write them down in a book afterwards, this will help you in the future and make astral projection more simple. You can refer to the book before the next time you visit the plane.

*BONUS TIP* How to visit someone on the astral plane

If you want to visit someone in your astral projection there are numerous things you can do to help. Spray the room with a fragrance that reminds you of them, focus on a photo of them for a while beforehand. Find an object of theirs and hold it in your hands.

Find a way to have that person in mind before you set out to the astral plane. It’s a good idea to ask their permission first, this will stop any resistance.

Astral Projection Tips Summary

Astral projection really does require focus and a positive state of mind. Along with relaxation and tranquillity. Before you even attempt it you should ensure that you have achieved all of these states.

Have you managed to reach the astral plane? What helped you get there? If you have any good beginners astral projection tips then please leave them in the comments below to help our readers. We may add them to the list. 

If you’re interested in mastering the art of astral projection then we can highly recommend you take the online course offered by Astral HQ – Check it out here.

Knife Throwing For Beginners

There’s something pretty cool about knife throwing which is why I decided to try it out in the first place. In this knife throwing beginners guide you’ll learn how to throw a knife and some other useful information about starting up in this hobby!

So lets delve straight in!

What is Knife Throwing?

Knife throwing is the skilled art of throwing knives at a target, this art is regularly used as a form of entertainment and is also a competitive sport.

There are many different types of throwing knives with many different styles of knife throwing.

Knife Throwing History

There’s not enough evidence to be sure about where knife throwing originated or its exact history, however, It is thought that the art of knife throwing began in prehistoric times where early man would use “throwing sticks” to hunt for food. As available materials advanced through discovery and metal was used for craft, it was then that the throwing stick developed into a throwing knife.

Over time many cultures would use throwing knives not only for hunting but as weapons in combat. Knife throwing was particularly common with Japanese warriors and African and Native American Tribes.

Knife Throwing History


Introduction to Knife Throwing

In the following Knife throwing beginners guide, I will teach you the very basic knowledge and skills, just enough to get you started, I can’t teach you much more because I am still learning myself.

You’ll learn about beginners knife throwing equipment, throwing techniques, knife safety and other basic aspects of this fun hobby.

I do however recommend searching for a local club or expert tutor you will learn the art of knife throwing much faster and more efficiently. It’s also safer at the beginning to be supervised by an expert.

Types of Throwing Knives

Different types of throwing knives fall into a few simple categories which I will now explain:

Blade Heavy Throwing Knife

The name pretty much explains the knife and this is the same for the next few types of throwing knives. Obviously, this type of knife has a weighted blade that is heavier than the body or handle.

Perhaps one of the most popular types of throwing knife for the beginner, it allows you to practice the basic hammer grip.

You hold the knife by the handle with the hammer grip and throw.

Check them out here >>>>

Handle Heavy Throwing Knife

Not recommended for total beginners the handle heavy throwing knife has more weight in the handle of the knife. Therefore you grip the blade when throwing so the handle propels forward first.

Check them out here >>>>

Balanced Throwing Knife

A balanced throwing knife unlike the previous two we have explained have the centre of gravity in the middle of the knife they are neither blade heavy or handle heavy. This allows you to throw the knife either gripping the blade or gripping the handle.

Check them out here >>>>

Throwing Daggers

Throwing daggers are triangular in appearance with the blade coming to a point. You have probably seen these in movies, they were made popular by Ninjas in Japan as an alternative to stars.

Check them out here >>>>

How does knife throwing work?

To better understand the dynamics of knife throwing we must first understand the components of a throwing knife:

The Weight

As a beginner, you should be looking for a knife with a weight of around 200 grams.

The lighter the knife the more difficult it becomes to control.

For more distance when throwing generally speaking you should opt for a heavier knife of 250 grams plus.

The Balance

As a beginner, the balance is a very important aspect of a throwing knife and the centre of gravity should be, give or take 1cm, in the middle of the throwing knife.

To find the centre of the knife take the knife and balance it on your index finger.

Some throwing knives as I will explain below are not balanced, this kind of knife is more for someone with experience and who has developed the skills. A general rule of thumb when throwing a weighted knife is to grip the lighter end before throwing.

The Handle

The most popular throwing knives are the ones that are crafted out of a single piece of metal, especially as a beginner knife thrower. These will be released from your hand much more smoothly.

Wooden handles are a little more comfortable to hold but are not as durable.

You will also find handles can be made of plastic and leather.

The Blade

Contrary to popular belief the blade of a throwing knife should not be sharp, as a beginner the last thing you want to do is injure yourself.

Believe it or not, having a sharp blade will not help the knife stick better into the target.

What is most important is that it has a tapering blade and the throwing of the knife.

The Sheath

When you buy a throwing knife you should try to look for one or a set that comes with a sheath.

A sheath is a cover for your knife which is used for transporting or carrying it around with you. (please see legalities of carrying a knife further down this article)

If your knife does not come with a sheath or cover you can buy these separately or if you’re quite good with your hands, make your own.

What equipment do I need for Knife throwing?

The beauty of the knife throwing hobby is you need a minimal amount of equipment to get going, you’re only going to need a throwing knife and a target, and if you want to practice safely a first aid kit for emergencies.

Most standard throwing knives will be relatively cheap to buy making this hobby a great choice if you haven’t got much money to spare.

The following is what you will need should you wish to start knife throwing as a hobby.

Knife throwing equipment list

Throwing Knives

As a beginner I would suggest you start with the blade heavy throwing knife, this is, of course, your own choice though.

A Target

All different kinds of targets exist in the world of knife throwing perhaps even more than types of knives.

Many people opt to create their very own knife throwing targets, which is relatively simple to do. If you aren’t the DIY type though you can get yourself one from here.

Many plans, how to guides and video tutorials to make your own knife throwing target can be found by doing a simple search on google.

Check out this cool tutorial on how to create a DIY knife throwing target.

Or if you’d like a DIY Guide and Free plan check this out.

Where can I buy Throwing Knives?

There are many places to buy throwing knives all over the world. However, depending on where you live will depend if you can go out and buy them from a shop nearby.

Buying online is a little more simple and there are many trusted retailers that you can purchase your throwing knives from. Here’s a couple of highly recommended online stores that deliver worldwide.

Amazon

Check out some throwing knives here >>>

US Stores

Knife Country USA

UK Stores

Hunters Knives UK

How to throw a throwing knife

Now that you have decided to learn the art of throwing knives you will need to learn the basic fundamentals of how to throw the knife.

To begin you will need to learn the beginners grip often referred to as the “Hammer Grip” it is the most basic of grips to learn and will not take you long to master.

How to grip the knife

  1. Imagine if you will that you are holding a hammer.
  2. Using your strongest hand whether that be your left or right, take the throwing knife and wrap your hand around it like you would a hammer.
  3. Then using your thumb to add extra control by placing it at the top of the handle, so your thumb is pointing upwards very similar to giving a thumbs up sign.

In the picture, you can see how your hand should look placed around the throwing knife.

How to stand

  1. Next,  let’s focus on your stance, you’re going to want to be between 8 and 12 feet away from your target.
  2. Place your left foot forward and your right foot behind, then turn your feet to an angle of approximately 45 degrees.
  3. Bend your knees very slightly until you feel stability and are comfortable. Try not to tense up and relax as much as possible without sacrificing stability and balance.

How to throw the knife

Now you’ve got the grip and stance down we are on to the throw!

  1. Let’s assume you are right-handed, put your left hand in front of you as if you are pointing towards the target.
  2. Take your right hand with the knife and bring it over your right shoulder above your head.
  3. Bring the right hand back down as if you are chopping something below, while your weight shifts forward you should now release the knife.

The release is the most important part and this comes only with practice, each time you throw take a mental note of where the knife ends up and then adjust your release accordingly.

You can check out this world champions beginners guide video >>>

Beginners Knife Throwing Tips

  • Practising every day can help develop muscle memory and in turn accuracy.
  • Carry more than one knife with you when knife throwing to save time going back and forth to the target to collect them after throwing.
  • If you don’t have a target at hand a tree, flat piece of wood or other wide wooden surfaces make good targets.
  • As a beginner knife thrower your knife will hit the target by the handle quite a lot and bounce back. Ensure spectators are stood well away.
  • Keep an eye on the handle of your knife and not the blade tip, if the handle hits the target first, adjust your position by moving forward a couple of inches.
  • Keep your wrist slightly locked and try your hardest to release the knife smoothly. Allow your hand to slide off the knife as you follow through, don’t overthink “letting the knife go”

Knife Throwing Safety

With knife throwing being a target sport you should adhere to a similar set of rules as you would in archery and when shooting targets.

Common sense is paramount, and if you use it then injuries and accidents are rarely heard of.

Bystanders

Ensure before throwing your knife that there are no people, kids, pets etc near to your target. Before throwing it is good practice to adopt a 20 feet rule. Do not throw until everyone is at least 20 feet away from your target.

Stay Aware

Although uncommon, it is possible for the knife to rebound off the target so you should stay alert and aware.

Breakables and valuable property

Before setting up your target check the area, make sure that there are no valuables or breakables anywhere near where you are throwing. As previously mentioned knives can bounce back the last thing you want is for it to bounce from the target hitting something valuable.

Safety checks of your knives

Before you handle a knife or throw it you should check it. This ensures that there are no sharp pieces of metal hanging off your knife, these sharp pieces of metal could potentially end up in your hand. It is good practice to carry files and tweezers to help remove these “burrs” safely

Throwing Knife Maintenance

After you have finished practice or using your throwing knife it is very important that you give them a clean.

You can simply take an old wet cloth and rub your knife down vigorously to get rid of any marks or stains.

Afterwards, take your knife and rinse it thoroughly in water and then dry it. You must make sure that the knife is dried completely.

You can also add a coat of protective oil, then rub it off before your next use.

Throwing Knives should be stored in a safe, dry place.

If you notice a nick or a dent in your throwing knife you can use a file, be gentle when filing and just take the nick out.

For bent throwing knives simply lay them across a hard flat surface and use your body weight by standing on them to straighten them out.

Knife Throwing FAQ

Are throwing knives illegal?

The legalities are solely based on the location you are in.

All states in the US have their own laws. As a general rule, it is illegal to carry the knives but not illegal to use them on your own property.

In the UK the basic laws on knives state that it is illegal to sell a knife to a minor or to carry a knife out in public without a good reason for doing so. Laws are more relaxed on knives with 3-inch blades or less, especially folding blades.

How sharp should my throwing knife be?

Not sharp! Sharp blades are very dangerous when knife throwing. They will cut your hand and are more brittle than a blunted blade. As long as the blade is tapered and has a point it will stick.

What age would you say is good for the knife throwing hobby?

This highly depends on the child. As a rule, anyone under 12 shouldn’t start this hobby. That being said if they are with a responsible adult and the throwing knife is not heavy then you could be a couple of years younger when you start. Under 16’s should always be accompanied by an adult when practising.

How hard should I throw a throwing knife?

Hard, but not stupidly hard! Hard enough for the tip of the throwing knife to be able to stick into the target.

Useful Links & References

In this section, I will list all of the websites and references that I have found to be useful to learn knife throwing.

Knife Throwing: A Practical Guide Hard Back Book

Beginners Equipment

DISCLAIMER

Hobbypatrol.com strongly advise the reader to use all safety precautions and tips made in this beginners guide. We are not responsible for any subsequent injuries if you choose to participate in knife throwing. We would also urge that as a beginner you look for a local specialist instructor or club to help you learn the art of knife throwing.

A Step by Step Beginners Guide To Magnet Fishing

Magnet Fishing For Beginners

In this beginners guide to magnet fishing we will teach you how to magnet fish, safety precautions and how to be a responsible magnet fisherman! The guide is intended for complete novices and we welcome any tips you may have to share with us.

Check Out This Full Magnet Fishing Kit On Amazon >>>

What is Magnet Fishing?

Magnet fishing is a form of treasure hunting, whereby using a powerful neodymium magnet attached to a rope you retrieve metallic items from bodies of water, such as rivers and lakes.

Over the past 2 years, the hobby of magnet fishing has become increasingly popular and received both good and bad press.

It is believed that the hobby was born when boaters would use magnets to try and recover lost keys from the water and has been adapted since then.

Rugby player, James Haskell, is a keen magnet fisherman and I believe initially responsible for the increasing popularity of the hobby after featuring in a TV documentary.

Common Magnet Fishing Terminology

Neodemon – A slang nickname that’s given to a person who partakes in magnet fishing with a neodymium magnet.

Magneteers – A collective name to the group of us who like to go magnet fishing

Neodymium – The most popular type of magnet used in magnet fishing, a rare earth magnet.

Is Magnet Fishing Legal?

Magnet fishing is legal in the UK but it is illegal to magnet fish without the permission of the landowner in which the body of water is located on, this would be breaking the law by trespassing I would imagine.

Magnet Fishing in the US is dependent on what state you are in. I would check with your local government office as it may not be a magnet fishing law that stops you from going out and partaking in the hobby, but it could be another law.

The explanation isn’t as simple as a yes magnet fishing is legal.

There are no laws against magnet fishing at the time of writing this guide.

Recently, especially magnet fishing in the UK has been tarnished by the bad press and many believe that before long there is a possibility that in certain countries and cities it could become illegal. I personally don’t believe this.

I am unsure of other countries, this is something you would need to investigate further depending on where you reside.

To find out more about the legalities of magnet fishing in countries other than the UK, it is a good idea to call your local authorities.

Magnet Fishing Code of Conduct

It is good practice to follow a simple code of conduct while magnet fishing. This will help keep the hobby safe and from being banned or made illegal in the future.

The magnet fishing code of conduct would be very similar to a metal detecting code of conduct.

  • Consider other people and the general public.
  • Remove all scrap metal & Litter, do not leave at the side of the water.
  • Report all find’s classified under the treasure act or treasure laws according to your locality.
  • Do not throw your scrap finds back into the water.
  • Report anything suspicious i.e. bombs, ammunition, weaponry to the local authorities.
  • Get permission from the landowner in which the body of water lies to be there, do not trespass.
  • Respect the wildlife.
  • Make a record of the location of any finds of historic interest.

What will I find when magnet fishing?

Magnet Fishing Beginners Guide - Things You May Find

The beauty and excitement of magnet fishing lie in not knowing what you will discover from the bottom of the water!

Over the years many things have been discarded or dropped into the bodies of water, some from crime and some by complete accident.

Some finds are more common than others and some are truly once in a lifetime discoveries!

The area in which you magnet fish will also determine what you find. Magnet fishing in the UK and in the US are worlds apart.

Here are a few examples of what you will and could find while magnetic fishing, bare in mind the type of thing you will find could depend on the body of water you are searching.

Common Magnet Fishing Finds

Bicycles, Motorbikes, Parts from boats, Coins, Fishing Items, Beer caps, Shopping Trollies, Tools.

Rare Magnet Fishing Finds

Knives & Guns, Safes, Cashboxes, Cars, Motorcycles, bombs, grenades.

Unique Magnet Fishing Finds

Swords, Iron Age Tools.

Magnet Fishing Equipment Checklist

Anything equipment wise that I will recommend in this guide has been tried and tested and has received many positive reviews. I’ve even used some of it myself. So you can rest assured that you will be getting the right advice.

What Equipment Do I need For Magnet Fishing?

One of the best things about the Magnet Fishing hobby is that you don’t need much to get you started and as long as you take care of your equipment and don’t lose magnets (more on this later) it’s rather cheap to take up.

There are, as per many of my guides some things included in this section that are mandatory and some that are optional.

Magnet

This is the main piece of equipment you will need before magnet fishing. It’s not as simple as visiting the local hardware store and buying a magnet.

You will need a neodymium magnet, also known as a rare earth magnet. Check out the “best magnets for magnet fishing

The neodymium magnets are very powerful and come in a range of sizes, to begin with, you’re going to want a good pull strength magnet but perhaps not the strongest, at least until you get used to recovering metal objects.

Check out The Beginners Magnet >>>

Rope For Magnet Fishing

The most important part about purchasing rope is that you buy the correct strength to support the pull strength of the magnet, the last thing you want here is to snap the rope and lose the magnet and metal item you have found.

Rope for magnet fishing comes in different break strengths and different grades, many people opt for paracord.

This is the best magnet fishing rope on Amazon.

Threadlock For Securing the Magnet

Threadlock is a specially designed and manufactured type of glue that stops the water from breaking it down. A lot of people choose to use threadlock to secure their magnet.

This will potentially stop your magnet from coming undone and save you a lot of money in lost magnets.

You can get your threadlock here.

Bucket or Container For Your Finds

You’re going to need something to put your good finds in while you’re out, some people just leave them at the side of the body of water. I personally like to move along and carry all of my good finds with me in a bucket.

Anything scrap that you are not taking should be left nearby and always remember to clear up at the end of the day and take your scrap with you or organise for it to be collected. Do not ever throw it back into the water.

Safety Gloves For Magnet Fishing

Safety gloves, in my opinion, should be mandatory when you’re out with your magnet you will be pulling out sharp bits of metal that are more than likely full of rust.

You should also wear a pair of surgical gloves beneath your safety gloves to protect your hands from any nasties like Lyme disease.

First Aid Kit

If you are responsible and you’re concerned about your health and safety you should have a first aid kit accessible.

First aid Kits are inexpensive and are very handy to have.

How To Magnet Fish

Setting up your magnet fishing rig.

Firstly, you will need to know how to setup up your magnet.

Most popular magnets come with a screw in eyebolt similar to the image below. They are incredibly easy to set up and typically you will just screw the eyebolt into the centre of the pot magnet.

Magnet Fishing Magnet With Eyebolt

Magnet Fishing Knots

There are a couple of popular knots for Magnet fishing, largely due to the security of the knots.

As you will be pulling at times very heavy objects you will need the knot to be as secure as possible, so here’s a couple of popular knots in the magnet fishing hobby with their respective “how to” videos.

How to tie the best knot for your magnet!

In this video by a popular UK magnet fisher, he explains step by step how to tie the knot through the eyebolt.

This is the same knot I have used and it has never failed me yet.

It’s important that you make sure the knot is strong as you do not want to lose your magnet.

Recovery Techniques

If I am completely honest you will find your very own technique of recovering the items from the water and I don’t really want to tell you how to suck eggs.

I personally either throw the magnet in and pull slowly back in or I throw in and wave it from side to side moving the magnet in the shape of a zig-zag across the waterbed.

This part is down to you really and finding your own personal preference of recovering items.

Where can I go Magnet Fishing?

There are many great places to go magnet fishing and it’s worth saying that you shouldn’t rush. Do your research and check that you have permission to go magnet fishing beforehand.

If you are looking for ideas then check out this article – 7 Of The Best Places To Go Magnet Fishing

Magnet Fishing Safety

There are so many dangers present when magnet fishing we highly advise that you read our dangers of magnet fishing guide and safety instructions before going out on your first adventure.

Magnet Fishing FAQ

What should I do with the junk metal I find?

You should never leave your junk metal and unwanted items on the side of the riverbed (or wherever you are) and abandon them. This is actually something that is causing problems for many people and giving the hobby a little bit of a bad name. You should never throw them back in either! Clear up your mess. Take them to the scrap man or dispose of them responsibly.

What kind of things may I find?

Many interesting things are found with a magnet in the water, some popular and common finds include safes, weapons, coins, boat parts, historic items of interest and much more. It has even been known for safes full of money and coins to be recovered!

What is a neodymium magnet?

A Neodymium magnet, also known as a ‘rare earth magnet’ is made from iron, boron and an alloy of neodymium. They are the strongest type of permanent magnet that is commercially available for purchase. In 1982 they were developed independently and now have replaced many other forms of magnets in items such as hard drives, tools and motors

What’s the most powerful magnet fishing rig?

With the popularity of the hobby increasing daily, people are wanting more and more pull power from their magnet rig. It is not uncommon now for people to use “double-sided” magnets. The power of these are now in excess of 4000lbs pull power or over 2000kg.

Is Gold magnetic?

No. Unless your gold is hidden in a safe then then there is pretty much zero chance your magnet will bring gold out of the water. This is the same for real silver to. Neither gold or silver is magnetic.

Can you make money from magnet fishing?

Don’t give up your day job. I would not recommend relying on solely money made from magnet fishing. That being said it is possible to make money from the hobby.

You can do this by saving up all of the scrap metal you drag out of the water and taking it to a recycling plant where you can “weigh it in”

Unless you are really lucky then you won’t make a lot of money in this hobby.

Useful Magnet Fishing Links & Resources

UK Magnet Fishing Forum

US Magnet Fishing Forum

The Best Magnet & Kits For Magnet Fishing 2022

Choosing a magnet for magnet fishing!

The best magnets for magnet fishing are neodymium magnets. They are rare earth magnets and are widely considered to be the strongest magnets available for magnet fishing, due to their incredible pull force.

The question often sparks a form of debate amongst Magneteers (magnet fishing enthusiasts) each wanting to believe they own the best magnet available to buy! With that being said the answer highly depends on your individual needs.

You can buy individual magnets online or you can buy the full magnet fishing kits.

The magnet fishing kits are made up of everything you need to go magnet fishing and then some! Magnet fishing kits usually will include a neodymium magnet, heavy duty rope, threadlock, a carabiner and sometimes come complete with a grappling hook. Yup if you’re a beginner some people like to use the hook. (more about this later)

Before you go out to your local hardware store or shop online and buy a magnet or a magnet fishing kit, you’ll need to know just a little bit more information to ensure you get the best magnet for you and your needs.

When starting up in the hobby of magnet fishing its not just a case of using any old magnet, you’re going to want to use a magnet that works well in the water, one that doesn’t break straight away and one that is powerful enough to attract what lies beneath it. It also needs to be powerful enough to keep it attached while reeling in the rope.

With the rise in success in the hobby, there are many magnet manufacturers that have specially designed magnets pretty much just for the hobby each trying to out perform each other.

What kind of a magnet will I need?

Neodymium, that’s the long and short of it. Nothing else will do in my opinion.

Some people may suggest a ferrite magnet, and while these cost a lot less they are far more brittle and will not last you as long. Many people who I have spoken to, that have tried ferrite, said the magnet smashed or lost power straight away.

Neodymium magnets are without a shadow of a doubt the best magnets for magnet fishing, they are tough and durable and will inevitably last you a long time.

You will also need to make sure you have a neodymium magnet with an eyebolt. This will allow you to set up your magnet fishing rig (the rope goes through the eyebolt) you learn how to do this in our beginners guide to magnet fishing.

The most common types are circular and pot shaped, with the actual magnets protected with a coating of Ni-Cu-Ni. This is a triple layer coating.

The neodymium magnet coatings are important as they keep the moisture from corroding the magnet. So when you have found the one you want to buy, do be sure to check what the coating is first.

Common good coatings are nickel-copper-nickel, Nickel, Zinc and chrome. There are others but these are generally what you should look for.

You can get square ones but I don’t know many people who have tried them out.

So now we have determined that you need a neodymium magnet with an eyebolt, what power range should you opt for. Who knew magnets could be so complicated?!

This is going to highly depend on what you intend to “catch”, magnet fishing location and what other equipment you have handy to help you recover the items.

For example if you’re going for a BEAST of a magnet, do you have the capacity to be able to reel it in? Is your rope strong enough? We have some good magnet fishing tips here if you want to read more about that.

As you advance in your magnet fishing career you’ll figure out ways to bring in the heavier objects so my advice for a beginner would be to go for something less powerful.

So here’s a list of the features the best magnet for magnet fishing should include:

  •  It must be a Neodymium Magnet (NdFeB)
  • Must be N42 Grade or higher
  • Must Have a Strong Coating (NiCuNi) with A3 Stainless Steel Cover
  • Must include a countersunk hole & eyebolt
  • Have a Pulling force of at least 500lbs (226kg)

What is the best magnet for magnet fishing?

There are a few big players to look out for when buying a magnet or a magnet fishing kit. These are the most popular for a reason.

Some magnet fishing manufacturers names to look out for are as follows:

Uolor, Brute Magnetics, Wukong, HHOOMY, Aitsite, First4magnets and Mutuactor.

This list is not exhaustive and of course as time goes on new manufacturers appear who are equally as reliable.

Check them all out here >>>>

All of the above mentioned though have built up a good reputation and have received many positive reviews as the best magnets for magnet fishing. They are also the leaders in developing new sizes, types and shapes.

Always read the reviews of the specific magnet before making a purchase to see how others have rated it.

What is the best power rating to opt for in a magnet?

Best Magnet For Magnet FishingIt’s a tough question to answer and before you proceed you should consider a few things first.

If you are only looking at pulling out small items then you really should avoid buying a big powerful magnet and go for something with a little less pull power.

You should bare in mind though that the items that have been in the water for years will have rusted and thus decreases the effect of the magnet. Some opt for more powerful just so they don’t miss out.

If you want to pull pretty much everything out then opt for something with a higher pull. Do remember though if the item is heavy you may need a friend or two to help you or some form of a winch to assist you.

As the hobby grows manufacturers are creating magnets with a much higher pull strength to meet the demands.

They’ve even now started producing double-sided magnets this gives a better coverage when dragging your magnet across the bed.

Magnets start very small with a pull strength of approximately 65lb these are perfect for children to use or if you’re only wanting to attract small metallic items.

The most powerful magnet I have seen so far is around 4200 lbs. This is, of course, a double-sided magnet with a combined pull power. Each side has around 2400lbs strength.

Grappling Hooks & Magnet Fishing

Magnet Fishing Grappling Hook
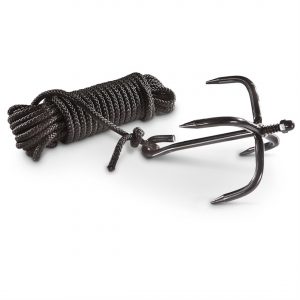
Another great way to ensure you don’t miss out on loot at the bottom of the water is to add a grappling hook to your kit.

The pull force of your magnet is not without conditions. There are many factors that can affect the power of your magnet, especially how it lies in the water and the shape of the object.

If you know there is something there and you can feel the pull with the magnet, but just can’t get it to stick then a grappling hook is the perfect solution.

By throwing in your grappling hook it may allow you to grab onto the metallic item and get a better grip for recovery.

Best Magnet Fishing Kits

As I mentioned previously some people are combining all of the equipment you will need for magnet fishing and putting it together in one pretty awesome magnet fishing kit.

I personally would say the best magnet fishing kit would include as follows:

  • Neodymium Magnet (of at least 760lbs pull power)
  • A grappling hook
  • Heavy duty rope (at least 65ft in length)
  • Locking Carabiner
  • Safety Gloves
  • Threadlock

So far the best magnet fishing kit I have found in 2021 is available below at a great price.

Neodymium Magnet Reviews

We would love to hear what your believe the best magnet for magnet fishing is! What’s your favorite setup? Any recommendations? How powerful is your magnet?

Leave us a small magnet review in the comments below and help out other magnet fishers.

10 Of The Best Singing Tips For Beginners

Follow these simple beginners singing tips to increase your vocal range and improve your singing voice.

When singing there are many things you can do to improve how you sound and your vocal range. 

These beginners singing tips will also protect your voice against fatigue and help prevent you from burning your voice out. 

I know that when I was singing in Spain and doing a lot of entertainment and karaoke hosting my voice became tired. I would sometimes do 5 nights a week and because it was one big party at the time I barely slept. This led to some very embarrassing and awkward singing moments. 

There of course many tips that a professional vocal coach, in depth online singing course or book will be able to provide you with. The following tips are just a few of the more popular and effective ones. 

Beginners Singing Tips

1. Stay Hydrated

Water, oh water. The magical elixir of life. One of my favorite beginners singing tips. Hydration is a huge part of your ability to reach certain notes or even sing at all. So let’s look at your vocal cords (folds) and singing voice as an engine. An engine does not work well without oil right? 

Your vocal chords are similar in a sense that they need to be hydrated and lubricated. Drinking room temperature water is one of the most important practices to keep your voice well maintained. When I say drinking water, I don’t just mean while performing or during practice, I mean all the time! 

To begin with you’ll probably be needing the toilet regularly but this will pass in time as your body becomes used to it. Try to drink between 8 – 10 glasses of water a day (8oz glasses)

I couldn’t stress this singing tip more. You’ll not only notice your voice and range improve but your whole health and wellbeing too. You skin, your hair and nails, your complex and you’ll have heaps more energy.

2. Rest & Sleep

Another important regime to follow is to ensure you get plenty of rest and more importantly sleep. Sleep is magical. As your body becomes tired so does your voice and sleep helps to heal our vocal chords and muscles. 

Sleep deprivation will effect singers in many ways for example lack of energy can reduce the energy we need for optimal breathing and in turn causes vocal fatigue. 

A good practice is to get between 7 – 9 hours of sleep a night. If you can’t hit this amount of hours or you’ve been deprived of sleep before singing, then you should talk as little as possible to rest your voice.

3. Exercise

Not only is exercise physically good for us in general it really can help with your singing. 

While exercising you are working out your cardiovascular system and your breathing. In turn this engages the diaphragm. 

A good exercise regime will increase your stamina and boost endorphins. 

If you stick to working out you will notice that you will be able to reach higher notes without straining and you’ll feel more energy, in turn more effort and emotion will go into your singing voice.

Some good exercises are walking, jogging, running, swimming and aerobics classes, anything that gives you a cardiovascular workout. Work out those lungs!

Try to exercise for at least half an hour daily to improve your singing voice..

4. Stretch your body

Stretch! Stretch everything. Stretch your face , your mouth, your legs, your arms, your body and all of your muscles!

It’s a lot more effective than you may imagine. 

Stretching gets rid of stress and tension in the muscles and body which can dramatically decrease your performance standards. Here’s some good stretching exercises for singers.

5. Sing in the Shower

Who doesn’t love a good sing song in the shower? I know I do, the neighbours also know I do!

What you probably didn’t realise is this is a fantastic place to warm up your voice.

The acoustics are often better in the shower and the steam moisturises your throat and vocal chords and in turn relaxes everything.

So sing in the shower while the bathroom is full of steam.

6. Breathing Warm Up Routine

One of the most if not most important parts of singing is your breathing, so as an athlete would warm up before competing in an athletic event, a singer should warm up.

Not just the vocal cords but your breathing too. You’re going to want to activate your diaphragm. This will help increase your vocal range and prevent unnecessary strain and fatigue on your vocals. 

Check out these beginners breathing exercises for singers.

7. Do not overreach.

Believe it or not sometimes too much practice is a bad thing. It’s also common for people to perhaps spend too much time warming..

Practice sessions should only last around 30 – 45 minutes with an adequate 5 minute warm up beforehand.

Start by singing easier to reach songs that are less demanding on your voice, build your way up to the more demanding parts of the song and then when it’s coming to an end try to warm down again. 

Some like to hum also at the end of practice.

Here’s a good 5 minute YouTube Warm Up.

8. Ask your friends & family

The best audience to practice in front of are your friends and family. Ask them to be honest with you and for constructive criticism and don’t be upset if you hear something you don’t like. 

Take all the advice and criticism on board and work to improve on these areas.

You can’t get better advice than a vocal coach. If you can afford to have lessons then I highly encourage this, your vocal coach will be able to identify the areas that need work and give you the specific exercises to help you improve.

9. Record yourself

There’s no better way of hearing what you really sound like than recording yourself. This way you can play it back and listen to the exact areas that you need improvement.

Your phone will suffice if you have no equipment, try to find a room with good acoustics. I find the bathroom has the best acoustics in my house. 

Setting up a small recording area in your home is not as expensive as you may think. A good basic setup on a budget can be found here.

Some great recording equipment can be found here.

10. Sing your heart out!

Emphasis, effort and passion are three things you need to put into your singing.

Feel the song, connect with it, throw all of your heart and soul into it. Believe it or not your facial expressions can change the way you sound, don’t be scared of looking silly.

Raw emotion and connecting with the song can drastically improve your sound, don’t overthink it all though, stay natural and relax.

Move around naturally, let the music guide you.

Singing Tips Summary

As I’ve previously said there are many beginners singing tips out there and these are in my opinion some of the most effective ones. 

Nothing will help you more than a vocal coach or singing tuition. If you can find the budget I would highly recommend it. 

I’m not a professional. The tips and Singing Guide For Beginners I write are all based on my own personal experiences. 

If you have any great singing tips for beginners, to add to this list then please use the comment area below to let us know about it. 

The Dangers Of Magnet Fishing & How To Stay Safe

Magnet Fishing Dangers – How To Stay Safe

Magnet Fishing is becoming increasingly popular all over the world and with more and more people taking part it’s only right that we discuss the dangers of magnet fishing and advise you on how to stay as safe as possible.

Already Magnet Fishing has developed a bad reputation largely due to the newspapers and media. However also due to the tragic accidents that have occurred some even resulting in death. These magnet fishing safety items can help keep you safe – Check them out here >>>>

Where there’s large bodies of water there are always dangers present. Even when you go to the beach on a family trip and you take a swim in the sea. 

Let’s take a closer look at some of the dangers that are presented when magnet fishing and how to avoid them.

  • Drowning

Where there’s water no matter how deep there’s that possibility of drowning, this risk increases with unstable bodies of water, currents, the weather,  the temperature.

During your time magnet fishing you’re going to become more and more tempted to get to more risky places. Increasing your chances of slipping or falling into the water. 

You may lose your magnet and think I have to go in the water to get it back. Unless you are in a very shallow stream or you are 100% sure it is safe with no risk to your life to recover your magnet. I would advise you not to risk it. No amount of money lost is worth your life.

Magnet Fishing Danger Drowning

It may be that you feel if you get in the water you can recover that heavy item attached to your magnet more quickly and easily. Again unless there is absolutely no risk. Do not do it.

A father and son duo were out enjoying a days magnet fishing when tragedy struck. Both of them died. It is thought that the father fell in and was drowning and the son tried to save him and also ultimately sacrificed his life. Nobody knows how this tragedy occurred exactly but what we do know was, a day of having fun, enjoying their hobby ended up fatal.

How to avoid drowning while magnet fishing

You can lower the risk of drowning while magnet fishing and eliminate many dangers just by being cautious and aware of your surroundings.

Where possible try to go with a friend or family member. Having someone with you decreases the risk but does not eliminate it. 

Tie yourself to an anchor point where possible, especially if you feel the ground surrounding you is unstable or slippery. You can use the friend you are with, a railing, a tree etc 

Wear suitable footwear with extra grip.

Don’t enter deep bodies of water to recover your magnet or a find. Sometimes you just have to put it down to a loss. The water may look completely harmless and still. You still have the dangers of an under current. You could get caught in weeds and other objects beneath the surface.


  • Dangerous Finds

I read in an article the other day when doing my research for this article that finding dangerous metal finds while magnet fishing is rare. This is NOT true. In fact it would be very wise to view each object you pull out of the water as potentially dangerous. 

Weapons are being pulled out of the water each and every day, magnet fishing, by people like you and I. 

Magnet Fishing Weapons

Guns, grenades, machetes and knives are but just a few of what has already been discovered regularly which are very dangerous, but all metal presents its own dangers.

Guns and explosive devices present their very own obvious dangers.

Most bodies of water hold bacteria, some more dangerous types than others. When you recover an item, not just knives, but all metal has the potential to be sharp, cut yourself while handling and you could be infected. 

How to handle dangerous finds

Firstly before I go into detail the most obvious step is to wear PPE. Gloves mainly. You can buy safety gloves for a minimal amount of money to reduce the risk of cutting yourself. 

When you pull your item from the water if you for a second believe it to be an explosive device or lethal weapon then contact the appropriate authorities, police, bomb squad or the local law department in your area.

Grenades and explosive devices if live have the very real danger of being fragile and temperamental especially after the corrosion that has occurred in the water. Proceed with extreme caution and always ask for assistance with recovery.

If you for example found a concealed weapon, a knife, an axe, gun or other item you believe could be crime related then do not handle it. You could quite possibly get your fingerprints on it or destroy potential evidence. Report it straight away.

  • The Magnet Dangers

If you haven’t handled a neodymium magnet yet, or seen just how powerful these things are then you need to know the dangers present .

These rare earth magnets are not toys. They present their very own dangers and are more powerful than you might imagine. 

The magnets are that powerful that they can interfere with electrical devices such as your mobile phone or at the very worst pacemakers. **Do not use these magnets if you or someone nearby has a heart condition and uses a pacemaker.

It’s not rare for these powerful magnets to slam together or to other metal items, for example a nearby metal railing. Get your fingers in the way and you could quite possibly lose them. Especially with the bigger ones. At the very least it’s going to break the skin and hurt.

How to avoid dangers of the magnet strength

Firstly when transporting your magnet or even just storing it at home, keep it in a protective case

Again wear protective gloves to protect your hands and the damage it may cause if it slams against another metal item and your fingers or hand is in the way. 

Do not use the magnet under any circumstances if you or the person/people you are with are using a pacemaker and have underlying heart conditions. 


Magnet Fishing Safety Tips


  1. Always wear thick protective gloves.
  2. Analyse the ground you are standing on before casting in your magnet, is there moss? Is it slippery? Do you have a good grip on the ground?
  3. Analyse the area, is it safe? Are there any tripping hazards? Are there people nearby?
  4. Carry a first aid kit.
  5. Clean your equipment thoroughly after use, clean your hands with alcohol sanitiser.
  6. Go with a friend, being alone is more unsafe than with a friend.
  7. Keep magnets at least 30cm away from electrical devices.
  8. Be careful of unexploded bombs and ammunition. Report suspicious items to the correct authorities.
  9. Wear appropriate non slip footwear.
  10. Tie yourself to a sturdy anchor point.


Magnet Fishing Danger Summary

This article on the dangers of magnet fishing does not list all of the dangers present. It is wise to analyse the area you are in and the body of water you are about to explore. Each place is different and unique and presents its very own dangers.

There are dangers present with the hobby of magnet fishing, perhaps a few more than many other outdoor hobbies. Be aware of them before you decide if this is the right hobby for you. Stay safe, stay sensible and don’t take silly risks. 

If you would like to add more information about the dangers of magnet fishing for our readers or perhaps you have a great safety tip. Then please leave us a comment in the comments section below.


7 Of The Best Places To Go Magnet Fishing Today

Where can I go magnet Fishing?

There are many places that you can go magnet fishing but the first thing you’re going to need to check is if you are allowed and have permission to do so. 

It is highly recommended that you follow the magnet fishing code of conduct and always ask permission first or check with your local governing body.

Best Places To Go Magnet Fishing

Some of the best places to go magnet fishing are:

  • Magnet Fishing in Rivers & Canals

Rivers and Canals are a fantastic place to go magnet fishing, especially the parts of the river that have had a lot of people nearby, for example when they are close to a road or a popular walkway. Many metallic items have been disposed of in the river over hundreds of years. Rivers and canals are also a common place for people to dispose of items from crimes and burglaries. 

Tip – Find a good bridge to magnet fish off

  • Magnet Fishing in Lakes

Lakes can have interesting metal items lurking at the bottom of them, try to choose a lake that has been popular over the years, perhaps where people have gone swimming or diving in the summer. Common places to find “busy” lakes are country parks and campsites. 

Remember to get permission from the lake owner beforehand.

Best Places To Go Magnet Fishing - Park Lakes

  • Magnet Fishing Streams

I recently did some magnet fishing in a shallow stream located in a busy little village, it was near some houses and I found a few coins. Finds were scarce but there are metal items that have been dropped in streams over the years as people have waded through them.

Streams were a popular place for kids and adults to play during summer times. They were also very popular throughout history as a source of water.

  • Magnet Fishing in The Sea or Ocean

The Sea and Ocean is probably one of the least fruitful bodies of water to go magnet fishing, but if you are at a loose end with nowhere to go it’s still an option.

It’s always a good idea to search for a heavy traffic area, like beneath piers or around rocky areas and rock pools. There is a chance that people have dropped metal items and if you’re lucky you may well just recover them.

  • Magnet Fishing Wells

If you are lucky enough to have found an abandoned well or know of a place where there is a well then I imagine this would be a good place to drop a magnet down.

Although I have never actually managed to see what kind of items are found at the bottom of a well, I believe that lots of metal objects, including coins, may have been dropped and also purposely thrown down a well. 

Remember to be aware of your surroundings and always consider your safety first.

When magnet fishing in wells you have to remember that over the years silt may have built up at the bottom burying any potential magnetic objects, a good strategy is to remove some of the silt beforehand. You can do this with a bucket on rope. We advise against climbing down the well.

Please don’t drop a magnet down a well that is still in use or that people visit as part of a tourist attraction.

  • Magnet Fishing at Historical Sites

It is becoming increasingly popular, as Magnet fishing becomes a more serious hobby for people to research historical sites with bodies of water. Then seek out permission, you may just find you are lucky enough to have the chance to magnet fish on a site rich in history.

Many natural lakes are more than 10,000 years old and were used frequently by many people in different periods of history. This means that over the years metal items of important historical interest were lost in these lakes.

If you find an item of important historical interest while magnet fishing, it is good practice to report it to your local Finds Liaison Officer (FLO) – https://finds.org.uk/contacts

  • Magnet Fishing Off Bridges

Old bridges and sometimes even new ones are a great place to discover interesting metal items beneath them when magnet fishing.

You’ve got to think about how people’s minds work and where they would dispose of items. You see it in the films all the time for a reason.

Many people over the years have and will throw things from a bridge when in a rush to discard it. 

Not only purposely throwing metal items into the water but when leaning over the sides of the bridge perhaps dropped things.

Bridges are in fact one of my favourite places to magnet fish and some of my most interesting magnet fishing finds have been from them, including a safe (empty unfortunately), a large “Rambo” style knife and believe it or not numerous bikes. My favourite was an old Raleigh Racer.

Places To Go Magnet Fishing - Old Bridge

Best Places For Magnet Fishing Summary

As a magnet fishing beginner, you are going to be very excited to rush out and start your hobby, we all felt the same at the beginning. However you must always be aware of the magnet fishing laws in your area and seek permission first.

There are many places you can go magnet fishing and you’ll find that some places have lots of interesting metal items and some you won’t find a single thing. The beauty of this hobby for me is just being outdoors with your mind focused on this wonderful hobby. 

It’s also worthy to mention that different bodies of water may require different magnet fishing setups. For example longer rope or a stronger magnet.

Do you have any other great ideas for places to magnet fish? If so let us know in the comments and we will add it to our best places to go magnet fishing list.

How To Fly A Kite For Beginners

Beginners Guide To Kites

In this simple to follow how to fly a kite for beginners guide, you will learn how to fly a single line kite as this is one of the most simple types to fly.

We will give you a brief introduction to kites then we will show you how you can successfully launch and fly a kite in a step by step guide.

What is a Kite?

Kites come in all shapes and sizes and are simply put, flying objects that are attached to the ground (or person) usually by a string, they require wind and aerodynamics to fly.

The main flying part of a kite is made from many different kinds of materials but commonly they are made from synthetics like ripstop nylon.

The pole often made from carbon fibre or fibreglass because of the lightweight properties.

Lastly the line or rope which you hold is usually made of dacron.

History of Kites

Originating from China nearly 3000 years ago is where we believe the history of kites began, they spread rapidly to other corners of Asia and were popular in countries like Japan and India. However, It wasn’t until the 1600’s that they had reached Europe and the USA.

The first Kites were made from light materials that were available all them years ago like paper or fabrics such as silk. The frame (poles) were often made from bamboo and flexible types of wood and the line was twine.

Over the years with the increasing popularity of kite flying new concepts have been designed like stunt kites and para-foil kites. They’ve even started a new extreme sport using kites called kite-surfing.

Beginners Kite Flying History

Benefits of Flying Kites

Kite flying is a hobby that brings numerous benefits, it’s also inexpensive and providing there’s some wind a hobby that children and adults alike can enjoy.

  • Exercise – Kite Flying believe it or not is a great core exercise that can work the muscles in many areas like the chest, back arms, abs and shoulders. It can also increase your hand and eye coordination.
  • Well being – Being in the great outdoors and getting some sunshine and fresh air can instantly make you feel good. Having something to focus on to distract you from day to day stresses is also great!
  • Fun – Kites have been around for thousands of years and one of the reasons behind this is flying a kite is fun. Good pure simple fun.
  • Family Bonding – What better way to spend time with the family & children than to take them out to fly a kite!

Beginners Kite Flying

What do I need to start flying kites?

Kite 

Obviously you’re going to need a Kite!

As this is a beginners guide we are going to be talking about the single line Kites.

The amount of wind you’ll need to successfully fly your kite will highly depend on the type of kite you want to fly. Generally speaking you’re going to want at least between 4 and 25 mph winds. Check the local weather before you plan to go out to avoid disappointment.

UK Wind Map

US Wind Map

Somewhere to go

You’re going to need a place to fly your kite and you’ll want to make sure you have plenty of space. You’ll often see people flying kites on fields, open spaces, beaches and parks.

What is the best Kite for beginners?

The single line kite is the best kite for beginners. These are the most simple to fly and will allow you to practice without feeling overwhelmed.

Pretty much everyone starts with the single line kite.

There are many more types of kites but as this is a beginners guide we will focus on the most simple type of kite to fly.

Single Line Kite Types

There’s quite a few single line kite types so I will just touch on this subject and list a few of the more popular types with a little information about what they are made up of and how they function.

Delta Kites

Delta Kites make for the perfect beginner kite. They are triangle in shape and are available to buy in a large range of sizes and styles. As standard the Delta kite fly without a tail (They are more visually appealing and have more stability with a tail) You can get Delta Kites that are perfect for children and they range from 4 feet to 6 feet in size. If you are wanting something bigger then they go right up to 19 feet in width.

Diamond Kites

Perhaps the most simple of kites to put together and fly. You can get the diamond kites again in a large range of colors, styles and sizes. As standard to get a diamond kite to fly to its full potential you will need a tail, this sometimes comes with the kite but can be added and modified.

Box Kites

A high performance beginners kite type known for its high lift. Belonging to the cellular kite family the design usually comprises of 4 struts which are parallel.

Parafoils Kites

A single line kite with no frame but one the cells fill with air the Parafoil kite becomes fairly rigid.

Fighter Kites

Kite fighting! Yes it’s a real thing. These fighter kites are usually of a small size and single line. They use the line tension for control.

Best Beginner Single Line Kites

What kind of kite should I get as a beginner?

Here’s just a couple of recommended kites, these kites are based on many reviews and ratings of other beginners and manufactured by leading companies in the hobby. You can’t go wrong with these as your first kite:

Zenith 5 Single Line Delta Kite

A very simple to fly “delta” kite made from the most durable and tough materials, so tough the manufacturers claim that it can’t be broken! They even claim that if you lose your kite, or it becomes caught in a tree you just have to send them a photo and a story of what happened and they will replace it FREE!!
Check it out here >>>>

Cool Arch 27 inch Ripstop Kite

Perfect beginners kite made from fibreglass rods and a toughened durable ripstop material, it’s a very simple kite to fly and is complete with everything you need as a beginner.
Check it out here >>>>

How to fly a kite for beginners

Launching your kite with a friend.

If you are out with a friend flying your kite then you’ll find a launch much more simple.

  • Unwind your kite line to around 25 – 30 meters.
  • Stand with your back facing the wind, your friend should have hold of the kite above their head.
  • Pull softly on the kite line while your friend just lets go.
  • If the kite begins to drop then you should pull in the kite, if the wind is very strong then simply let out some more line.

Launching a kite on your own

  • If you’re trying to launch your kite while alone then let the kite drift out of your hand.
  • Let out some of the kite line while it drops near the ground.
  • Next pull in the line, not to hard to force the kite into gaining some height.
  • Now let out some line to let the kite take flight.
  • Keep repeating the same process until you are satisfied with the height the kite has reached.

Manoeuvring your kite in the air

The beginners single line kite is not the best kite for manoeuvres however that being said you can still control their actions to a certain extent. This is achieved by letting the line out or by bringing the line in.

If the kite is diving towards the ground you should try to reel the line in slowly until the kite stabilises, this is probably because the winds are too strong at the height you have the kite.

The same goes if you don’t have enough wind and the kite becomes unstable, let the line out a little to gain some height.

If you find the kite going to far to the left or right if you just let out the line a little you should find that again the kite will stabilise.

Let’s now say the kite is going just where you want it to go but you want some more speed then let out some more line and the kite should accelerate.

How to land your kite

Bringing your kite down is often straightforward there are actually a couple of very effective ways of doing this, the first is to simply reel the line in. Usually this is fine for kites that are smaller and in conditions where it isn’t too windy. Ensure you bring the kite in slowly.

Secondly if you are flying a bigger kite and are with a friend, then this method will be more effective. Ask your friend to take the reel, or if you are alone secure the reel to the ground with a peg. Take the line (wear gloves) and walk along side the line. Keep bringing the line down to your head height as you walk along. If your friend is there get them to start to reel in the line gently. If you are alone just keep going until the kite is on the ground. You can then reel the line in. Remember to secure your kite by weighting it down so it doesn’t take off again with a gust of wind.

If you prefer to watch an example and aren’t much of a reader then take a look at this how to fly a kite video:

Kite Flying Beginners Tips

How to tie a knot for a single line kite

The most common and straight forward knot that people use when flying a kite is called the Larks head Knot.

Larks Head Kite Knot

Step 1.) Take the loop of the string and pull through the front of your two fingers.

Step 2.) Take the other end and pull it through the bottom of the of the other loop that you are holding with your fingers on the other end.

Step 3.) Now you need to pull your two fingers through.

Step 4.) Next take the loop and place it on the end of the other kite string.

Kite Flying Safety Tips

It is important to remember safety first when you’re flying a kite. There are many risks that exist and the following pointers will help you stay safe and avoid accidents and injury.

  • Keep well away from power lines and cables
  • Do not take your kite out in a thunderstorm, stop immediately if one starts while you are out.
  • Stay as far away from people when you are flying a kite, especially children.
  • Check the ground surrounding you before you are flying kites, watch out for holes or tripping points.
  • Watch out for dogs, they like to play and could runaway with your kite.
  • Stay away from traffic areas like roads and car parks.
  • Wear gloves.
  • Wear sunglasses, this will help protect your eyes from the sun as you are looking up at your kite.
  • Do not try to recover your kite should it get caught in a dangerous area, buy a new kite do not risk harm or injury.

Kites FAQ

Can it be too windy to fly a kite?

Yes it most certainly can. Winds between 4 mph and 25 mph are best.

Can my Kite fly without a tail?

Yes it certainly can, there are many kite types that actually don’t have a tail. The tails are more for aesthetics. That being said tails can contribute to keeping a kite more stable.

A Beginners Guide To Crystal Healing & Crystals

Crystals & Healing

What are Crystals?

They come in many shapes and sizes and in the practice of crystal healing have different properties and uses.

Crystals are natural minerals that the earth forms beneath the ground over thousands of years.

What is Crystal Healing?

Many believe that Crystals are an effective form of healing.

Classed as an alternative medical technique, but is not popular with traditional doctors and medical practitioners.

Crystal Healing is a holistic energy-based healing treatment that can treat many forms of illness and problems by healing their energy system. If performed correctly it can be very relaxing and tranquil.

Although there is absolutely no scientific evidence to support that claim that crystals can heal, it is still practised largely all over the world with many strongly believing in the healing properties of the crystals.

How does Crystal healing work?

It is believed that specific crystals and gemstones have properties that can help facilitate healing using the positive energy from the stones.

During a typical Crystal healing session, crystals or gemstones are aligned on the body at different “chakra points” these are usually placed near the head, on the forehead, throat, chest, gut and on the genital area.

Different stones and placements will be used for different disease and illnesses that the patient may suffer with.

Along with the above mentioned treatments at a Crystal healers it can be practised by anybody from the comfort of their own home, and home crystal healing is becoming more and more popular.

Some wear crystals on the body or sleep with them close-by or beneath their pillow to promote mental and physical healing.

Scientifically how does Crystal healing work?

There is no real scientific evidence to support that Crystal healing works, however scientific studies have shown that a positive “placebo” effect can occur.

Although no scientific evidence is present to support the belief many have experienced positive results and believe that it is a powerful alternative medicinal healing therapy.

Crystal healing is practised by a large number of people worldwide and has been for thousands of years so in my opinion “the proof is in the pudding”

Crystal Healing History

Evidence suggests that the first ever historical references for crystal healing was from the ancient Sumerians, they used Crystals in magic formulas. This was nearly 6000 years ago.

The ancient Egyptians also used crystals to ward off negative energy and disease.

Today the practise of Crystal healing is largely based on Asian cultures.

Mainly based on the Chinese life-energy concept, chi and the Buddhist or Hindu practice of Chakras. Chakras are believed by the Chinese to connect physical and supernatural “energy” elements of the human body.

Read more about the history of Crystal healing.

What things will I need to practice crystal healing?

The hobby is very inexpensive and to be honest there isn’t really that much that you will need to get yourself started.

Firstly I would recommend an in depth crystal book in which you can refer to while studying and practicing.

There’s a wonderful reference book wrote by Karen Frazier, it includes over 200 remedies for the mind, soul and heart you can buy it here.

You will of course need crystals or a crystal, you can buy them online here.

Perhaps a crystal wand, a very popular choice is found here.

If you wanted to be more serious about it you can take many online courses here.

That’s about all really to get started, you can grow your crystal collection as time goes on.

A very inexpensive hobby to get into.

An introduction to Crystals

As a beginner delving into the world of crystals and crystal healing can feel a little overwhelming, with hundreds of types of crystals in all shapes and sizes, where do you actually begin?

Before even thinking about starting you need to learn to trust your inner conscience and spirit. This is what guides us to the right crystals for the right purpose.

Let’s begin the learning process with learning more about the most common types of crystals and the basics of how to use them.

Crystal Shapes

In this part of the beginners guide I will list a few of the basic crystal shapes, there are many more.

These are just a few of the more common crystals you will need as a beginner.

Sphere

Also commonly known as a Crystal ball, not the type you look into though. These crystals are cut and polished into a perfectly round sphere shape. The sphere shape crystal will radiate energy evenly in each direction.

Because of the spherical shape they are connected to the earth, moon and other planets.

They are generally used for slowing down or even neutralising negative and unbalanced energies.

Crystal Spheres can be held over Chakras or passed through the aura.

In home use a sphere will need a stand for display and can bring a harmonious and peaceful energy to the home.

Placing a Crystal Sphere in the middle of a Crystal grid will promote protection, healing, peace and psychic development.

Pyramid

Pyramid Crystals can direct and anchor energy.

A largely popular choice for home Crystal healing, the pyramid shaped crystal can stabilise earth energies and enhance and project from the apex.

Smaller Pyramid shaped crystals can be placed along Chakras to balance.

In Crystal Grids, the pyramid crystal can be used to protect a specific person, raise vibrations and amplify your healing intentions.

Tumble Stone

The most common of crystal shapes, the tumble stone is also known as “tumbled stone”

Small crystals and stones are tumble polished to create a shiny and smooth surface on the crystal.

The Tumble stone crystals are usually smaller stones, but they are available in large sizes too.

An all purpose Crystal stone, radiating energies in all directions these stones are so versatile that they are generally carried around on your person.

They can also be placed on the chakras, worn directly on the body, placed in vases and bowls around the home and are one of the most popular choices for the Crystal grids.

Heart

Heart shape crystals/gemstones represent compassion and also composure.

They can be used to work on the healing chakra, this can be located in your chest.

Heart shaped crystals and stones work in a similar way to palm stones, they are used as support stones that you can hold onto when you are in need of strength.

They also work well if you are in fear, they help to calm you.

Heart shaped stones give out “good vibes”

Cluster

Clusters are a bunch which are naturally grown.

Cluster crystals contain amplified energies and are the premium group.

You will find that they are often used in grids (more about these below) chakra training, communication with spirits and for astral projection.

These cluster crystals can be used to raise the harmony of a space.

Natural Point

Natural Point stones are a natural shape, they are rare to find.

These crystals can help you to absorb “chakra” and dispel the energy.

Often used in pendulums, wands, for healing and feng shui.

Palm

Palm shaped crystals/stones are flat in shape and are made from tumbled stones.

They are easy to carry with you as they fit nicely into the palm of your hand. (hence the name)

You can use palm stones for many different crystal therapies, meditating and for feng shui in the home.

A good video below if you’ve got 15 minutes spare, Annie Tarasova explaining what they are, how they are formed and meanings of popular crystals.

How to choose a crystal

Choosing a crystal can maybe feel overwhelming at first especially as a beginner.

People are so focused on wanting to choose the right crystal and not making a mistake that they forget to use what matters most. There intuition.

Crystal healing is a spiritual hobby so it only makes sense that you would use your inner spirit to choose a crystal.

Some say that the crystal chooses you, so you need to ensure that you open your heart and your mind to allow this to happen.

Whether you are in a shop or buying your crystal online, you should clear your mind and open your heart. Take your time and allow yourself to be drawn to the crystal. Be patient. When you know you’ll know!

Keep your intention in your mind and either look at the crystal or hold it if possible. How do you feel? Do you notice any strange sensations like increase in heart rate, hot or cold feelings, a feeling of peace? Look for the signs.

What are intentions?

Our inner voice and thoughts create vibrations. These are sent out throughout the universe which is why intentions are so important.

Clear intentions and clear purpose provide insight into our dreams and values.

Imagine if you will your intentions are a magnet. In crystal healing having clear intentions allow the crystals to do their work. Set yourself clear intentions that are positive and your hearts desire.

  • Prioritise what is most important to you.
  • Think about aspects of your life that you want to improve.
  • Be clear about your goals and how long you will give yourself to achieve it, find reasons behind your goals.
  • Make your intentions a reality, write them down in present tense. Only write what you truly want, do this from your heart.

How to program and cleanse a Crystal

Before we talk about how we build a crystal grid, most importantly we must learn how to give our crystals their purpose and their job.

You have to program your crystals.

This is a very straight forward process.

Firstly we cleanse with sage smoke. This is achieved by placing the crystal in the smoke from the burning sage. There are alternatives like incense or Frankincense resin that you can use but sage is the most popular.

Then we leave our crystals in either moonlight or sunlight for a minimum of around 5 hours.

Now we bury the crystal in the ground for a few hours, this allows the crystal to be come charged with the energy from the earth.

Take the crystal straight from the earth and hold it in your hands. Breathe deeply, relax and let your eyes close. Go to a happy place and ensure your mind is full of love, peace and tranquillity.

While you’re in a happy place, with your crystal in your hand and your eyes closed ask your crystal to be cleared of negative energy. Say the following:

“I ask that the highest vibration of love and light connect with my highest self to clear all unwanted energy and any previous programming. I command these crystals to hold the intention of my infinite potential, (add your intentions here for the crystal to store) thank you, thank you, thank you!

What is a Crystal Grid?

Now we know how to cleanse and program our crystals we will learn about crystal grids.

Simply put a crystal grid usually consists of a centre stone and then numerous stones set in a formation spreading outwards from the centre.

Crystal Grids vary in size, they are very effective for creating intention energy and hold onto the energy for a long time after it is set.

The formations create harmonizing vibrations and link the energies of the stones/crystals.

How to Create Your very Own Crystal Grid!

To begin with you will need to make a decision on what kind of energy you would like to create and establish, this can be done with knowledge and intuition. Don’t overthink this as there is no real right or wrong way. Many will use a point in the center of the grid because it merges the energy radiated from the crystals together in harmony. It will also amplify the energy outwards. You can use a grid cloth to help with symmetry and map out the grid.

To choose your crystals you should first decide on the ones that are related to your intention. For example if your intentions are ones of love, then you would need stones related to love like malachite, carnelian, amazonite, rose quartz, flourite etc

Once we have chose our stones then we need to purify the energy of them. You can purify using sage smoke.

Now you will need to write what your intention is on a sheet of paper. Fold the paper and say it out loud. Next take your “intention paper” and place it underneath the center stone.

The center stone is the main stone which you will place in the middle of your grid. It is popular to have a center crystal with a point to transmit the energy outwards.

Next you will build up your grid around the center stone, these crystals are used for amplifying the energy.

Crystal Grid Example
An example of a crystal grid

The grid can be as full as you like, you should always remember to place them mindfully and to lead with your inner spirit.

Next you will need to “activate” the grid. We do this with a quartz laser point and draw a line to connect every stone, the line is invisible of course but as you draw it you should be visualising the intention you wrote on the paper becoming a reality.

It’s up to you how far you go with the crystal grid, you can add incense and candles around your grid to further amplify.

*You should leave your grid up for at least 30 days after you set it up.

What is a Crystal Wand?

There’s so much to write and learn about crystal wands so i’m just going to briefly touch on these. If you want to read a full guide to them you can do so here.

Crystal wands are made from crystals and are usually shaped with a point or cylindrical.

Quartz wands usually occur naturally but for other crystal wands you will need to take the stone and polish it.

They are used in crystal healing to further amplify the power and energy.

There are many types and each has it’s own specific use.

Chakras

If you’ve arrived here and are interested in Crystal healing then you no doubt have a basic understanding of chakras but for those of you who don’t let me elaborate.

Chakras are concentrated centers of energy in the body.

Their purpose is to absorb the energy and to keep us functioning on a day to day basis at optimum levels.

There are two types of chakras in the body these are minor and major.

Chakras are believed to control how we feel and our health. If chakras malfunction or are not looked after then we can end up feeling depressed or even becoming sick.

It is important as a crystal healer to look after our inner chakras by eating healthily and by positive thinking and love.

Located along your spine there are 7 main chakras.

These are:

root, solar plexus, sacral, heart,third eye, throat, and crown chakras

Each are tied to problems with the body, both physically and emotionally.

If you gain a better understanding of your chakras it’s a fantastic way of growing as a crystal healer and also a way to work in harmony with mind, body and soul.

3 simple ways to use crystals

These are 3 beginner ways to use basic crystals and what you have just learnt. These will increase harmony, your peace of mind and spiritural balance.

Clear Quartz

Quartz Crystal
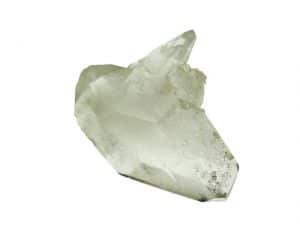
Clear quartz is one of and if not the most popular type of crystal for beginners.

The crystal will amplify intentions from your crystal grids and the vibrations of the surrounding stones.

You can create a clear quartz wand to cleanse and energize crystals.

Take the clear quartz stone, sit somewhere peaceful and try to feel the positive energy radiating from the stone, let the white light that emits from it fill you. Think about your intention and believe in the quartz crystal.

Amethyst

Amethyst CrystalAnother very popular crystal for beginners is Amethyst, it is fantastic for meditation as it will give spiritual projection and increase your inner strength.

Again while contemplating the intention set out for the crystal you should put it in your bedroom or even at your desk in the office to invite the calming energies.

Amethyst is often used for healing in Yoga and meditation.

Citrine

Citrine CrystalCitrine draws the power of the sun and is filled with light in abundance. This makes the crystal fantastic for placing in a windowsill.

The sun will then recharge it every day, keeping its powerful vibrations at a maximum.

Citrine is considered one of the most powerful stones used for manifestation.

As a beginner you are going to want to have citrine, it will increase the chances of making your intentions into a reality.

Citrine also creates a positivity and  will stimulate your mind for motivation and to help you become more optimistic.

Take a citrine point and

Place a citrine point on top of a list of your dreams and intentions.

Beautiful to look at and are great healing crystals which will help us connect with Mother Earth.

Crystal Healing FAQ

Is Crystal healing the hobby for you?

I believe crystal healing could be for anyone. It will help you improve your mental health and your physical health.

Learning about crystal healing opens the door to so many other healing practices.

Not only that learning about the crystals and their powers is intriguing and exciting.

Is there more than one different crystal healing technique?

Yes there are many, however I believe the crystal grid to be the most popular and the best for beginners. As you advance in your crystal healing journey you will no doubt learn many more crystal healing techniques.

How do I choose the best healing crystal?

The best way to chose healing crystals is to let your spirit guide you, use your intuition and feel the crystal. This is perhaps one of the most amazing parts of crystal healing.

Can I use crystals just for decoration in my home?

Yes of course they look beautiful and on the plus side your home will be full of good energy!

Useful links

Types of Crystals and Uses

Online holistic & crystal shop

Crystal healing online courses

Crystal Healing Discussion

If you have any questions or would like to talk more about the wonderful hobby of crystal healing then please leave a comment below we would love to hear your questions and experiences.